User Guide
Supported platforms and software
| Name | supported | Additional marks |
|---|---|---|
| Trados Studio | yes | --- |
| RWS Language Cloud | yes | --- |
| SmartCAT | yes | --- |
| Lokalise | no | XLIFF 2 support is missing |
Translation Manager's navigation bar
The Translation Manager feature can be accessed in the Ibexa backend by clicking on the Translation icon in the left navigation bar (Fig. 1). This will open three sub tabs which guide through the translation process.
How this process works in detail is described in the sections below.
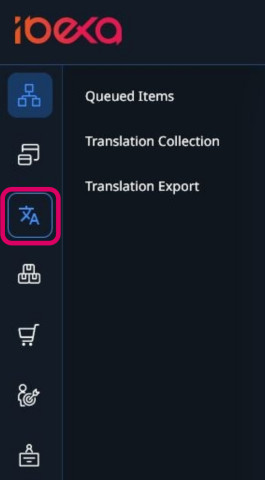
Fig. 1: How to navigate to the Translation Manager in the Ibexa backend
Add content to the queue
To add content directly to the translation queue (tab Queued Items) navigate to the content via content tree (Developers Guide).
- go to Content -> Content structure
- select the content that needs to be translated
- click on Translation in the toolbar on the right (Fig. 2)
- tick Add to queue -> this will add the content and its child nodes to the queue
- go to Translation -> Queued Items and check the added content in the queue (Fig. 3)
- content remains in the queue until further usage (see step 'Create a new collection')
Exclude content from the queue
You can also define if a content (and its sub-nodes) should be excluded from sending to queue.
- go to Content -> Content structure
- select the content that should be excluded
- click on Translation in the toolbar at the top (Fig. 2)
- select the required option:
- Exclude node from translation -> this will exclude only the selected content
- Exclude node with children from translation -> this will exclude the selected content plus all sub-node
Note: If you choose Exclude node with children from translation this can only be reverted via Edit -> Translation -> Publish.
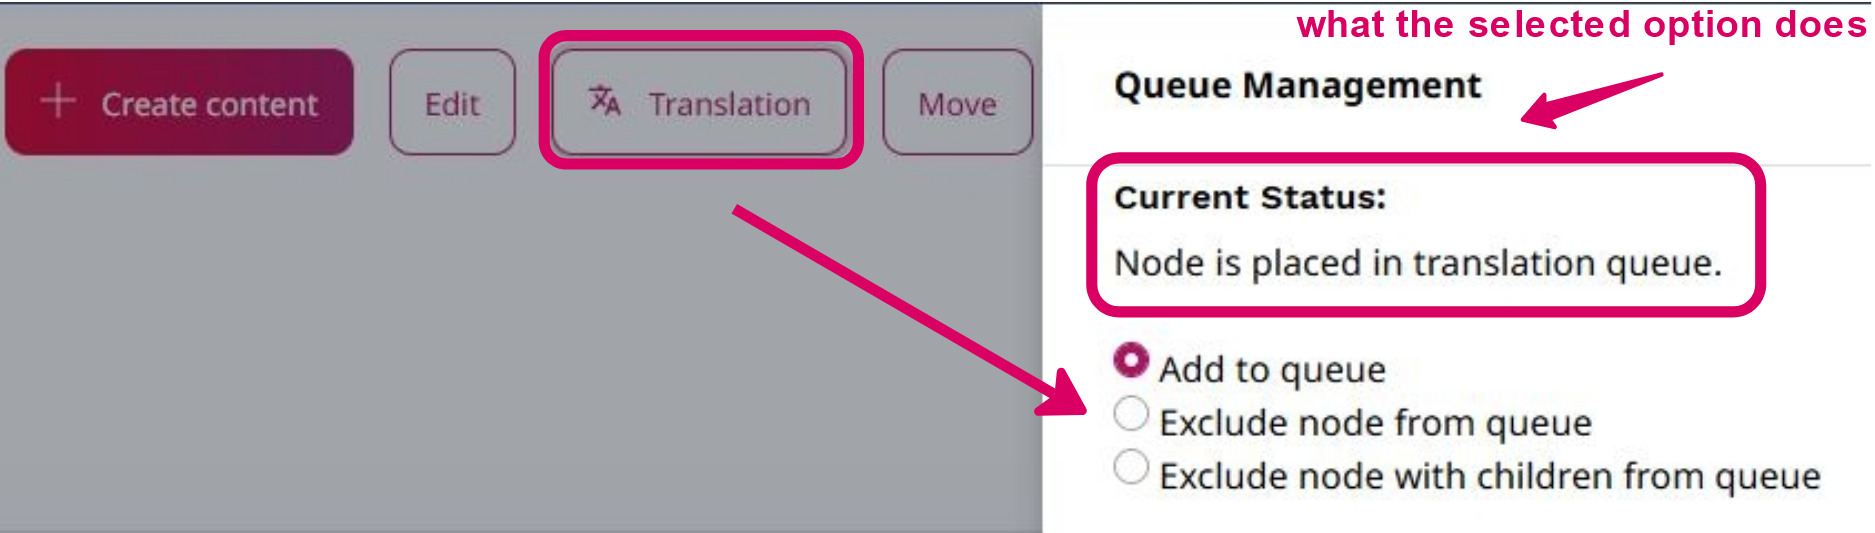
Fig. 2: How to add or exclude content to the translation queue

Fig. 3: Overview of menu 'Queued Items'
Disable queue management completely
Additionally it is possible to enable the queue management only for certain content trees (Developers Guide). As a result content in all other locations can't be added or excluded for translation (Fig. 4).
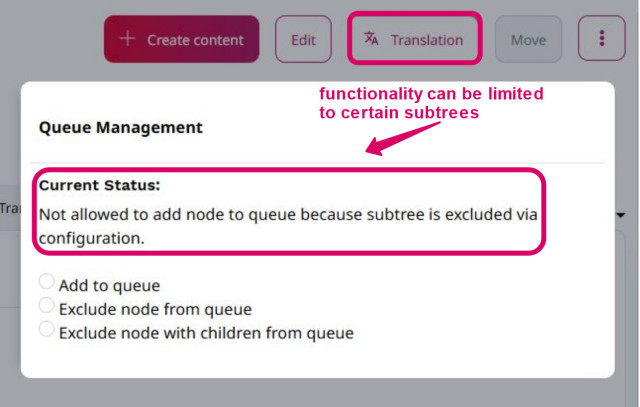
Fig. 4: Disabled queue management, options cannot be selected
Create a new collection
Alternatively not only single contents can be added for translation but also entire nodes with their sub-contents (Developers Guide). This is possible by creating a collection (tab Translation Collection).
- go to Translation -> Translation Collection
- click on the button '+' above right (Fig. 5)
- navigate to your folder, e.g. via Browse, Bookmarks or direct Search (Fig. 6)
- add a content by clicking on the button '+' which pops when hovering over the content
- choose With Children if all sub-contents should be included
- choose Exclude Current Node if ONLY sub-contents should be included
- choose Include all items queued for translation if all items from the queue should be included
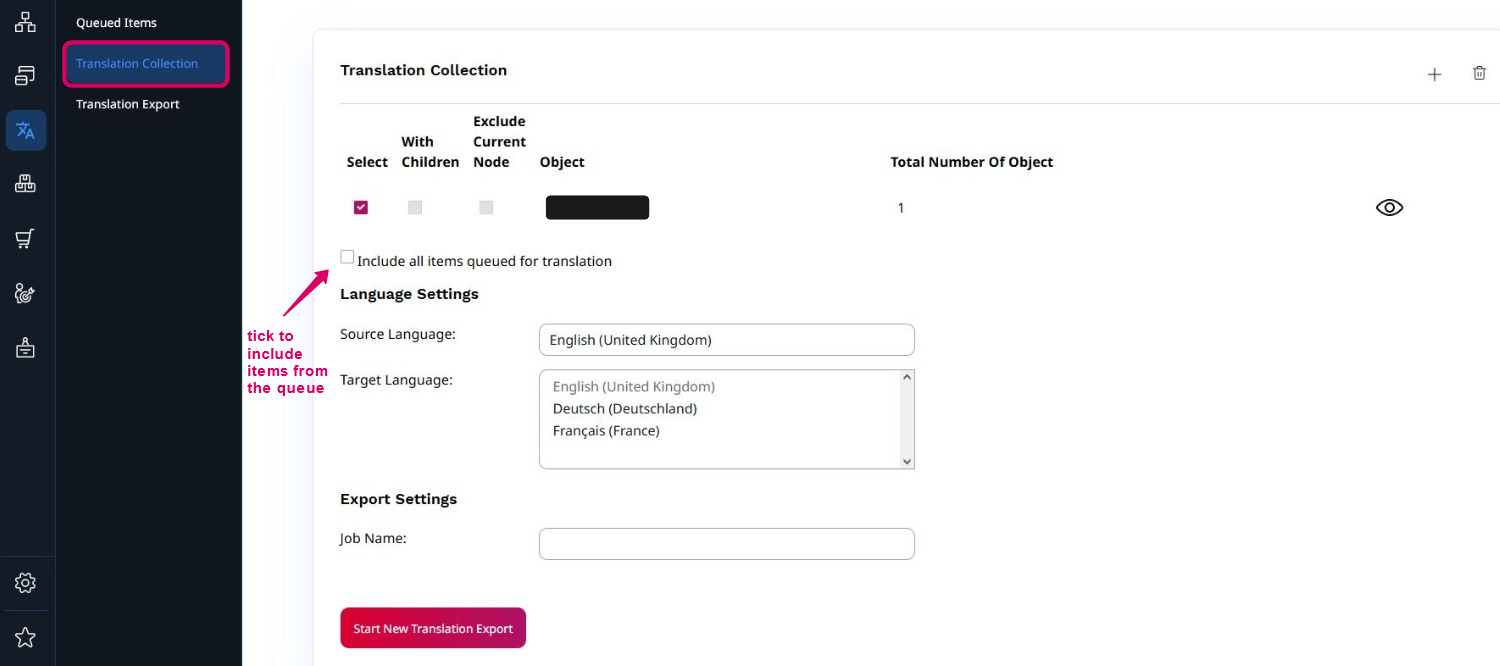
Fig. 5: Overview of menu 'Translation Collection'
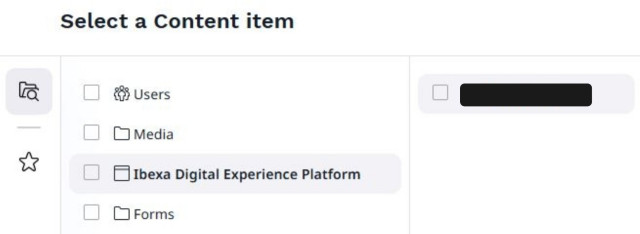
Fig. 6: How to add content to a collection
Export content for translation
After selecting the relevant content these items need to be exported for external translation (Developers Guide). For this purpose the Translation Manager uses the XLIFF file format. As a result all information about the selected content is stored in a XLIFF file.
How to generate an XLIFF export:
- use the content picked in the previous step at Translation -> Translation Collection (Fig. 7)
- tick the Select-box of the collection(s) to add them to the export job
- select Source Language (Fig. 5)
- select one or multiple Target Language(s)
- choose an export name in line Job Name
- click on Start New Translation Export
- go to tab Translation Export (Fig. 7)
- search for your job (newest on top)
- click on the number of Total Objects to get to the section Translation export at node level (Fig. 8)
- note that Target Language is currently Red which means 'File not uploaded' yet
- go to the eye icon under Action (Fig. 8)
- check here if all selected contents (collections and queued items) are available (Fig. 9)
- each content redirects to its location in the content tree
- click on the Download-button (Fig. 7)
- store the ZIP-folder with the created XLIFF-file for further handling
- extract the ZIP-folder by right click -> Extract All
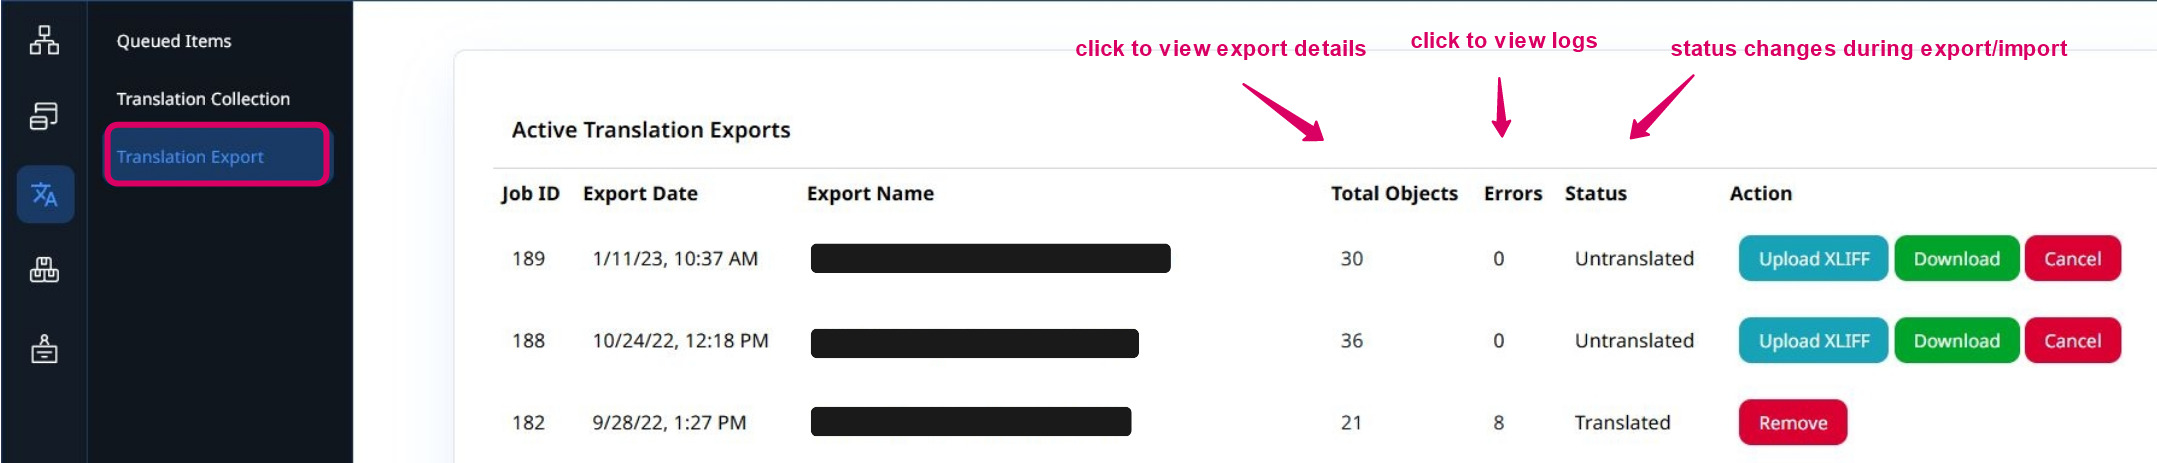
Fig. 7: Export menu for down- and uploading XLIFF-files

Fig. 8: Summary of a created export job ('File not uploaded')

Fig. 9: Overview of all selected items in an export job
Basic notes on XLIFFs
File names
XLIFF files will be named like: test-translation-42-s-eng-GB-t-dan-DK.xliff
The following information are included:
- job name (test-translation)
- job ID (42)
- source language (s-eng-GB)
- target language (t-dan-DK)
Empty paragraphs
In XLIFF files you may find a section:
  <ignorable>
    <source> </source>
    <target> </target>
  </ignorable>
This was introduced to avoid issues when a content has text fields which are empty or just contain some spaces (empty paragraph).
In this case the <ignorable> tag marks the paragraph as not-translatable, or the translation <unit> is omitted entirely.
Although the default behaviour of the Translation Manager is to render empty paragraphs using <ignorable> this can be changed (see
the Developer Guide). You would then find XLIFF where <segment> contains
empty paragraphs.
For example:
    <unit translate="yes" canResegment="no" id="price_tag" name="price_tag" type="ez:ezstring">
      <notes>
        <note category="description" priority="6">Price Tag</note>
      </notes>
      <segment id="1" state="initial">
        <source>
        </source>
      </segment>
    </unit>
Usually, the Translator can simply leave the translation empty, but in some versions of SDL Trados with certain project configurations that is not possible. As a workaround, it's possible to configure empty placeholder text so that, for example, the following XLIFF is produced:
    <unit translate="yes" canResegment="no" id="price_tag" name="price_tag" type="ez:ezstring">
      <notes>
        <note category="description" priority="6">Price Tag</note>
      </notes>
      <segment id="1" state="initial">
        <source>**do_not_translate**</source>
      </segment>
    </unit>
The Translator should not change this empty placeholder text. When the translated XLIFF is imported into Ibexa, these placeholders are removed automatically. See the Developers Guide for how to configure the website.
Prepare translation environment
The actual translation is typically done by computer assisted translation (CAT) tools like SDL Trados. The detailed procedure might vary slightly depending on the used tool.
This is a short overview about how to prepare translating via SDL Trados (Fig. 10):
- click on File -> New -> New Local Project
- select some default settings like Project Name, Location Path and Source / Target Languages
- add the XLIFF-file in your project via Project Files and click on Add Files
- (optional) continue customizing the project
- click on Finish to create the project
- double-click on the XLIFF to open the file
- start translating
- save the translated XLIFF-file (File -> Advanced Safe -> Save Source As)
Note: By clicking on Batch-Tasks -> Pseudo-translate a simple out-of-the-box translation for testing purposes can be generated.
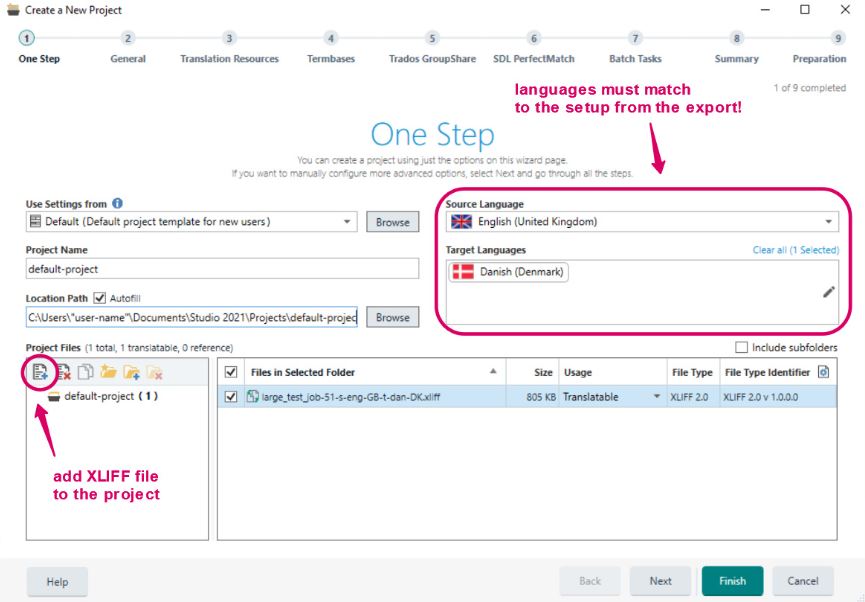
Fig. 10: How to create a new project in SDL Trados
Import translated content
After a translation is done the new XLIFF needs to be uploaded in the Ibexa backend (Developers Guide).
- in the backend go to tab Translation Export
- search for the related job from the previous steps
- click on Upload XLIFF (Fig. 7) and select/upload the translated XLIFF-file -> Status will change from 'Untranslated' to 'Ready to import'
- click on Start Import -> Status will change from 'Ready to import' to 'Queued for import' respectively 'Running Import'
Note: 'Running Import' may change to 'Failed' if a
CRITICALerror (Fig. 11) occurs. In this case you can click on Reset in order to delete the uploaded XLIFF as well as the related error log and get back to status 'Untranslated'.

Fig. 11: Example of a failed job with the 'Reset'-button
- after the import is done -> Status will change from 'Running Import' to 'Translated'
- click again on the number of Total Objects to get to the section Translation export at node level
- check if the Target Language is Green which means 'Upload successful' (Fig. 12 compared with Fig. 8)
- now there is a new translation for each processed content (tab Translations)
Note: Job status might not change before you reload the backend URL. Importing XLIFF-files with a high amount of content objects (e.g. more than 100 content objects) can take up to several hours.

Fig. 12: Summary of a successfully imported job ('Upload successful')
Error logging
During export and import different error messages may appear in section Errors (Fig. 13).
- in the backend go to tab Translation Export
- click on the number of errors to get more details
- in these error logs timestamp, severeness and a short description are provided
Note: Process will stop (Status : 'Failed') in case of type
Critical. In case ofWarningit will not stop, log the warning and keep running (Status: 'Running Import').
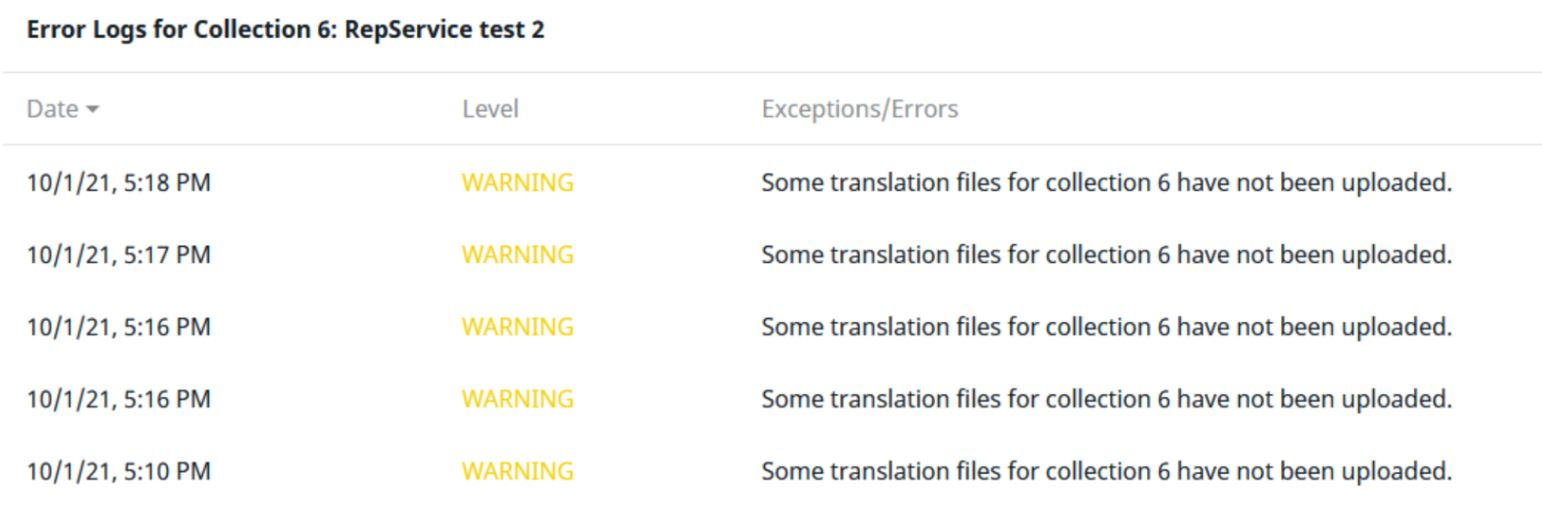
Fig. 13: Example of an error log
Handling critical errors and stalled processes
In some cases a critical error may occur and the status may not change to 'Failed'. There may even be no error messages logged and the process may appear to be stalled.
In this case, the job may have been saved in a special queue. Ask your dev-ops team to check and retry failed messages by running this interactive command:
bin/console messenger:failed:retry --transport=translation-manager-failed -vv
It will show details of the failed message including a stack trace and allow a retry.